

heatsynclabs.io project
X/Y Plotter
Ressurecting Matt Shepard's plotter thats been in the attic for a decade.

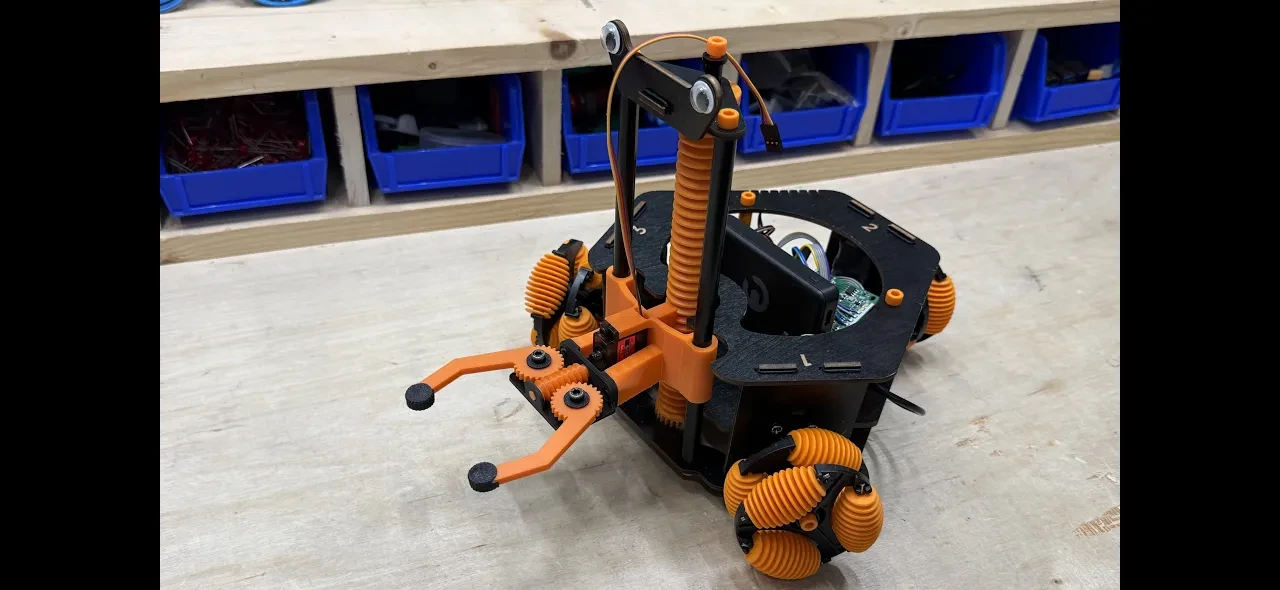
A mod of the Hack Pack Omnibot Forklift adding precise maneuvers, a robotic gripper, a web control interface, remote camera streaming, and much more.
https://github.com/HeavyFalcon678/FPV-Omnibot
This a hack of the Crunch Labs Hack Pack Box #011 - Omnibot Forklift that unlocks its full potential and allows you do do fun things like:
Add a 3D printed robotic gripper to pick things up
Control the omnibot from a web dashboard on any device using the same network
toggle a slow mode to enable precise maneuvering
combine a camera with the web UI to add remote web streaming
To allow as many people as possible to upgrade their omnibots, I there are multiple different configurations you can use:
Precision (no extra hardware)
Gripper (stock remote + gripper)
Dashboard (stock omnibot + RPi)
GripUI (gripper + RPi)
FPV (RPi & camera, no gripper)
LEGENDARY (gripper, RPi, & camera)
1x Hack Pack Omnibot Forklift (You can get $10 off the Hack Pack subscription by using code FRIEND-8Z96W87 at checkout)
Arduino or Hack Pack IDE set up
3D printed parts can be found at https://github.com/HeavyFalcon678/FPV-Omnibot/tree/main/3d_files
| Component | Qty | Notes |
|---|---|---|
| SG90 or MG90 Servo | 1 | - |
| M3x8 BHCS Screw | 4 | $25 for all hardware |
| M4x8 BHCS Screw | 2 | - |
| M4x4x6 Heatset Insert | 2 | - |
| Jumper Wire M-M | 3 | $7 for all jumpers |
| Jumper Wire M-F | 3 | - |
| 3D Printed Parts | 1 | PETG or PLA works fine |
| (Optional) Grip Tape | 1 | - |
| Component | Qty | Notes |
|---|---|---|
| Raspberry Pi | 1 | - |
| 5V Battery Pack | 1 | - |
| USB Cable | 1 | - |
| Jumper Wire F-F | 9 | $7 for all jumper wires |
| Component | Qty | Notes |
|---|---|---|
| Raspberry Pi Camera 3 Wide | 1 | - |
| 300mm Raspberry Pi Camera Cable | 1 | - |
| Female to Male Jumper Wires | 9 | - |
| M2x6 BHCS Screw | 4 | $25 for all hardware |
| M2 Hex Nut | 4 | - |
First, set the M4x4x6 heatset inserts into the gripper base. Then drop the leadscrew into its slot and use the retaining pin to lock it in place (you may need a drop of glue to secure it).
Next, use two M3x8 screws to attach the servo to the gripper mount, making sure that the servo output shaft is on the bottom. Then use the other two M3x8 screws to connect the gripper base to the mount.
Finally, insert a M4x8 screw through a cap and gripper arm into the base twice, making sure to line up the gear teeth together. Then unscrew the top of the robot, slide the forklift piece off, slide the gripper assembly on, and rebuild the robot's top.
Set up the pi as normal using the Raspberry Pi Imager. I'd recommend using Raspberry Pi OS Lite (64-bit), but you can use whatever you'd like. Make sure to write down the hostname, username, and password. Also MAKE SURE to connect the pi to WiFi and enable SSH with password authentication.
When you're finished, insert the SD card into the pi and power it up. Wait a minute or so, and then connect to it by running ssh *username*@*hostname* and enter your password. When the login is finished, run wget https://github.com/HeavyFalcon678/FPV-Omnibot/raw/main/forky.sh && . forky.sh install && . forky.sh run and follow the prompts.
Finally, run echo "$(hostname -I | awk '{print $1}'):5000" and take note of the output. This is the URL your web interface will be running on. Then reboot the pi and everything should be good to go.
If you're adding the camera, mount it onto the 3d printed camera mount using the four M2x6 screws and M2 hex nuts. Unscrew the top M3x8 servo screw, attach the camera mount, and screw it back into place. Finally, connect the 300mm camera cable to the RPi.
For the gripper wiring, connect the servo to power and ground, and the signal wire to digital pin 10 on the Arduino.
For the RPi wiring, the connections are listed below (BCM format).
RPI <-> ARDUINO
GPIO4  - A5
GPIO17 - A4
GPIO27 - A3
GPIO22 - A2
GPIO10 - A1
GPIO9  - A0
GPIO11 - D12
GPIO5  - D11
GND - GNDYou can find all the program code for this hack at https://github.com/HeavyFalcon678/FPV-Omnibot/tree/main/arduino_code. If you're using a Raspberry Pi upload pi.ino, otherwise use noPi.ino. Also make sure to include the config header, regardless of which one you are using.
If you are using the stock RF remote, the additional controls are as follows:
UP + L -> Open Gripper
UP + R -> Close Gripper
DN + L -> Toggle Slow Mode
If you are running the webUI on a RPi, go to the URL you wrote down at the end of step 3 and it should work automatically, with all the buttons being self explanatory. On desktop there are some keyboard shortcuts:
W -> Up
S -> Down
A -> Left
D -> Right
Q -> Rotate CCW
E -> Rotate CW
W+A -> Diagonal Left Up
W+D -> Diagonal Right Up
S+A -> Diagonal Left Down
S+D -> Diagonal Right Down
SPACE -> Toggle Fast/Slow
I -> Raise Fork
K -> Lower Fork
J -> Open Gripper
L -> Close GripperThis hack won first prize in the CrunchLabs Hack Pack Contest #001
This project is part of the The devEco Open Hardware Initiative (devOSH), an initiative for open source hardware collaboration. Learn more about it here.
If you have any issues or questions, feel free to contact me on GitHub or Discord and we can discuss them.