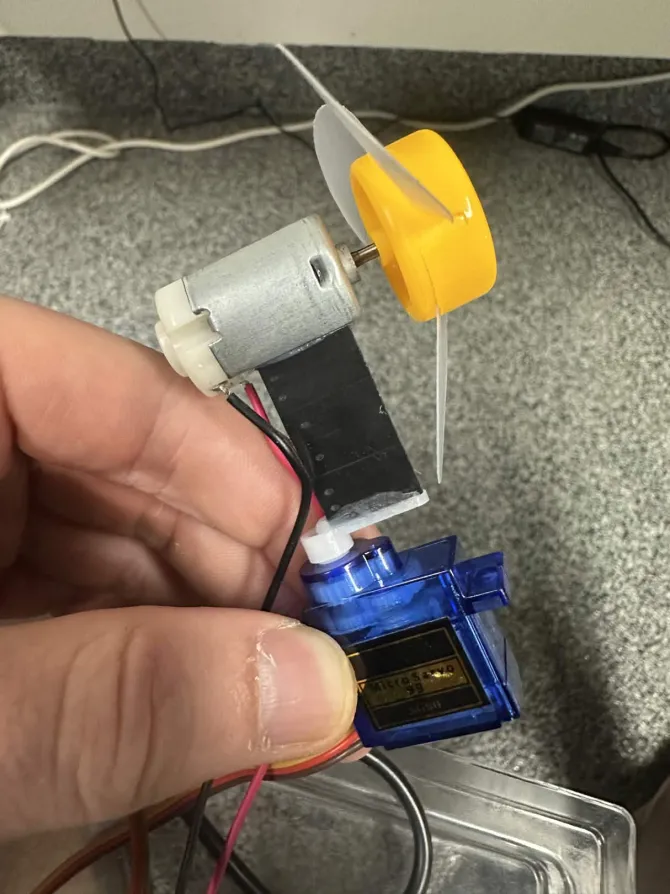
I just needed to add a servo to be able to power the fan on & off from pin 0.
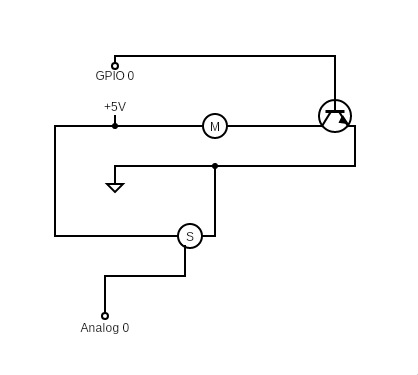
This is the resulting circuit diagram(my very first).
Programming
I struggled a lot at first because the Uno Q wasn't being detected by arduino-cli board list. I later found out that the board takes about 30 seconds to boot - the heartbeat animation means it's booted.
I also struggled with serial output. I found that instead of Serial, they use Monitor. For example:
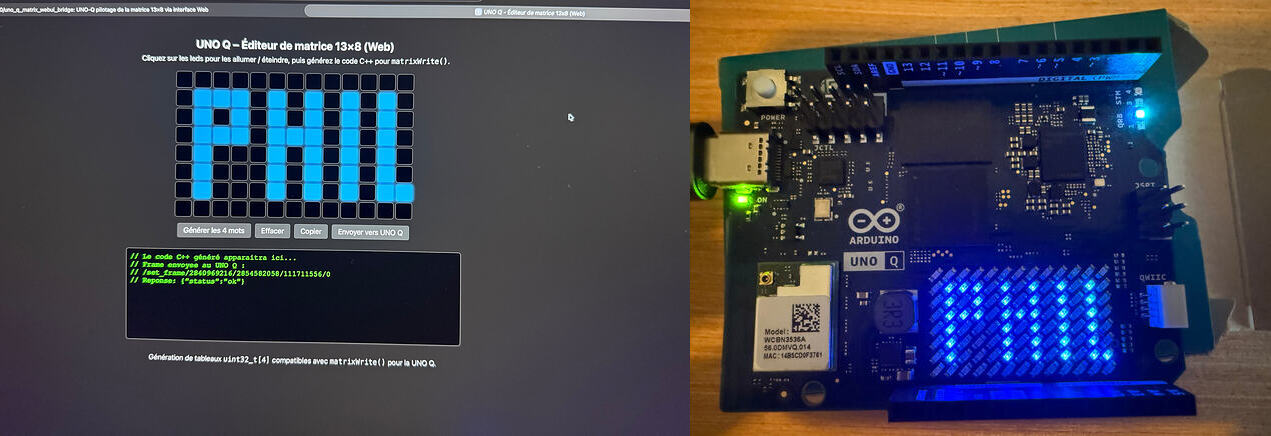
For remote-control - you may have seen the "Matrix Editor" example in the Arduino App Lab, where you can paint the LED grid from a web app, as seen here(image credit to J-M-L Jackson on the Arduino Forum:
In the example, the web-server python script imports arduino.app_utils - which I was not able to import outside of the Arduino App Lab, nor find much documentation on. Luckily, however, you can open up a TCP server with the Arduino_RouterBridge library.
After I figured out how to spin up a TCP server, I figured a protocol like this would work best:
1// turn fan on0// turn fan off190// turn fan on & turn to 90 degrees0180// turn fan off & turn to 180 degrees10// turn fan on & turn to 0 degrees
This would allow me to connect to the device over netcat & maneuver the boat as I pleased. Here's the whole program:
#include<Arduino_RouterBridge.h>#include<Servo.h>
Servo servo;
BridgeTCPServer<> server(Bridge, "0.0.0.0", 8080);
voidsetup(){
Monitor.begin(9600);
matrix.begin();
Bridge.begin();
server.begin();
pinMode(0, OUTPUT);
servo.attach(A0);
}
int n = 0, fan = 1, deg = 0;
char buf[128];
voidloop(){
BridgeTCPClient<> client = server.accept();
digitalWrite(0, fan ? HIGH : LOW);
Monitor.print("writing to servo");
servo.write((deg)%181);
while (client.connected()) {
String cmd;
if (client.available()) {
cmd = client.readStringUntil('\n');
cmd.trim();
// fan-on/off degrees
n = sscanf(cmd.c_str(), "%d %d", &fan, °);
if (n >= 1) {
Monitor.print("setting fan");
digitalWrite(0, fan ? HIGH : LOW);
}
if (n >= 2) {
Monitor.print("setting servo");
servo.write((deg)%181);
} else {
deg = last;
}
}
sprintf(buf, "scanned %d - %d %d - %s\n", n, fan, deg, cmd.c_str());
Monitor.print(buf);
delay(500);
}
}
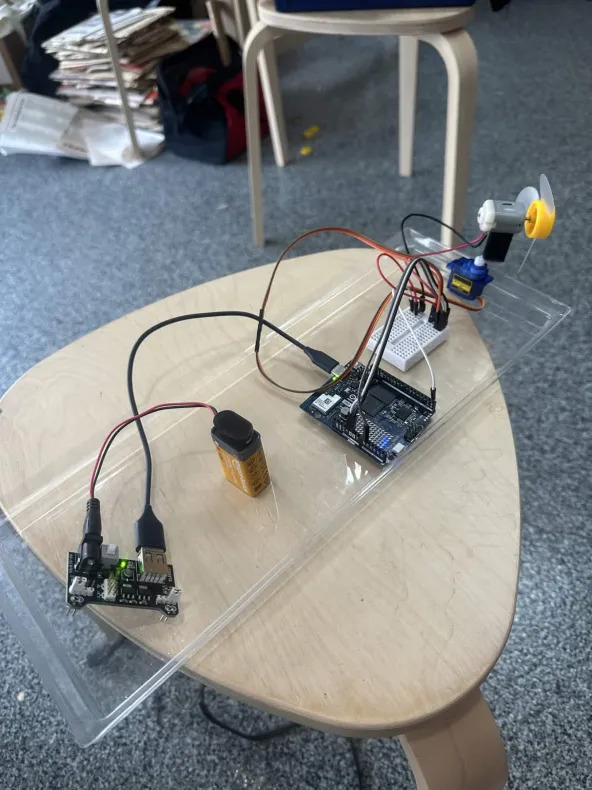
For power, I tried connecting it to a 9V-battery, like this:
Though it did it's "arduino-logo" boot sequence, it didn't show me the beating heart animation on the LED matrix & it wasn't accessible over the network. I've read that the 9V battery doesn't provide enough current to the board.
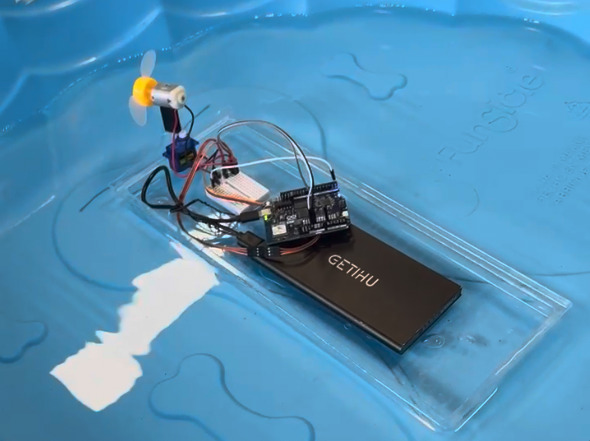
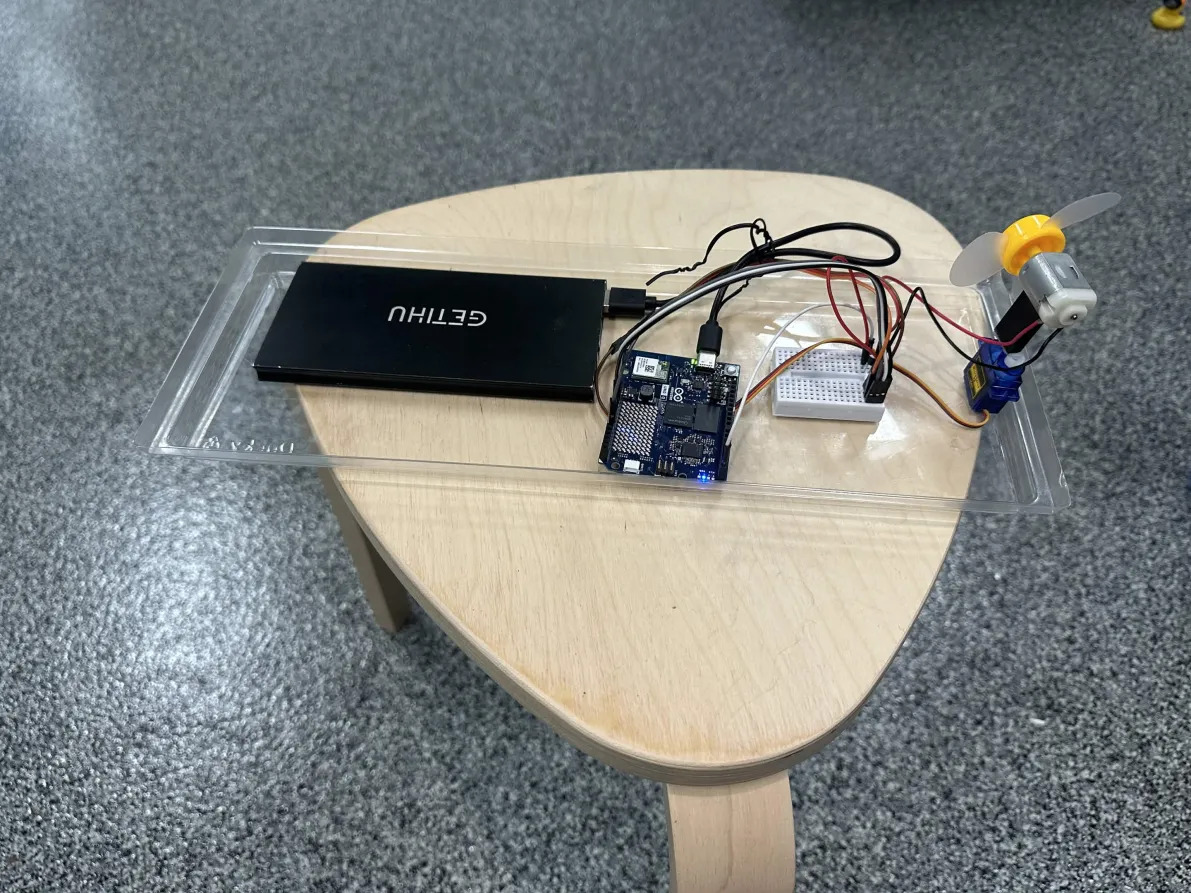
Luckily, my friend let me borrow his portable phone charger, which was much heavier. Though it did boot normally, I was concerned it would sink the boat.
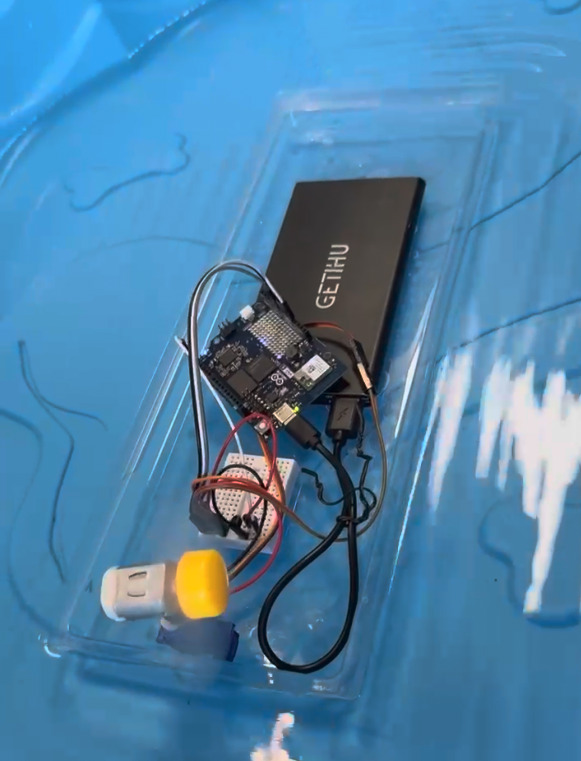
But it stayed afloat & nothing got wet.
The vessel moved a few inches a minute or so, and the servo was incredibly jittery, but I was very pleased to see the proof of concept!
Next time I may try a lighter-weight power source, or multiple fans.


No comments yet. Be the first!